Mountain Lake Reflection 3D Layered: A Guide to Creating Depth with Paper
In the world of digital crafting and home decor, there is a distinct shift toward projects that offer both visual depth and tactile satisfaction. One such project that has captured the attention of creators is the Mountain Lake Reflection 3D Layered design. This isn't just a flat image; it is an intricate architectural blueprint for creating a three-dimensional shadow box that mimics the serene beauty of a mountain landscape mirrored in still water. Whether you are a seasoned papercraft enthusiast or a beginner looking to add a unique touch to your living space, understanding the mechanics and potential of this template can transform a simple afternoon craft into a lasting piece of art.
The Anatomy of a 3D Shadow Box
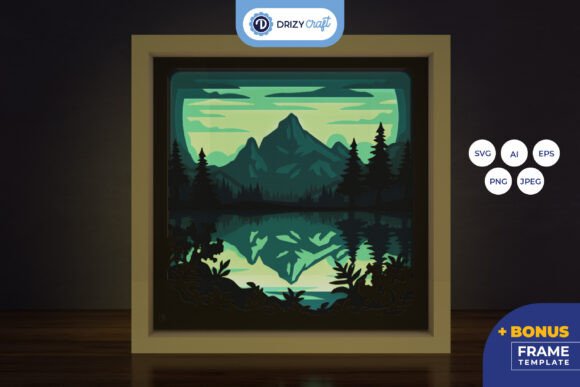
To truly appreciate the value of the Mountain Lake Reflection 3D Layered Paper Cut - Lake 3D SVG, one must first understand the concept behind 3D paper cutting. Unlike traditional single-layer silhouettes, layered designs utilize multiple sheets of cardstock stacked at varying distances from the background. Each layer represents a different plane of focus—foreground, mid-ground, and background—creating an illusion of depth when viewed from the front. The Mountain Lake Reflection 3D Layered template specifically leverages this technique to separate the rugged peaks of mountains from their shimmering reflections in the lake below, a feat that requires precise alignment and thoughtful material selection.
This particular design consists of eight distinct layers. In papercrafting, the number of layers often dictates the complexity and the richness of the final image. Eight layers provide enough detail to create smooth gradients and distinct separations between elements like trees, rocks, water ripples, and sky clouds without becoming overwhelmingly difficult to assemble. The square format of the template (714 x 714 px in digital dimensions) ensures that the composition remains balanced, making it ideal for standard framing options.
Technical Specifications and File Formats
For professionals and hobbyists alike, the versatility of the source files is crucial. The product offering includes a comprehensive suite of formats designed to accommodate various workflows and equipment capabilities. Understanding these specifications helps users determine how best to proceed with their project.
- AI and EPS (714 x 714 px): These vector formats are essential for designers who need to edit the design before printing. They allow for scaling without loss of quality, ensuring that lines remain crisp regardless of the output size.
- PNG and SVG (714 x 714 px): The SVG file is particularly valuable as it is directly compatible with cutting machines like Cricut and Silhouette. It contains the path data needed for the machine’s blade to follow precisely. The PNG provides a raster preview that can be used for reference or manual cutting.
- JPEG (3000 x 2000 px): High-resolution previews are included to help users visualize the final color palette and layout before committing materials.
The physical dimensions of the finished piece are noted as 20.32 × 20.32 cm. However, because the SVG file is scalable, users are not strictly bound to this size. You can resize the design to fit larger frames or smaller displays, provided you maintain the original aspect ratio to prevent distortion of the landscape elements.
Assembly and Tools Required
Creating the Mountain Lake Reflection 3D Layered project is a meditative process that rewards patience. While the digital files simplify the cutting phase, the assembly requires a steady hand and a clear workspace. Here is what you will need to bring this landscape to life:
- Cutting Tool: If you own a electronic cutting machine such as a Cricut Maker or Silhouette Cameo, the process is largely automated. Simply load your cardstock, upload the SVG, and let the machine cut through the layers. For those without these devices, a sharp craft knife (such as an X-Acto) and a self-healing cutting mat are sufficient. Scissors can be used but may result in less precise curves.
- Adhesive: To achieve the 3D effect, you need spacers. Double-sided foam tape is the industry standard for this type of project because it adds thickness between layers while keeping them flat against each other. Alternatively, small strips of double-sided paper tape can be used if you prefer a thinner profile.
- Backing Board: A sturdy piece of cardboard or foam core serves as the base. This prevents the layers from warping over time.
- Alignment Jig: Many creators use a center mark on every layer to ensure the design remains symmetrical during assembly.
When assembling, start with the back layer (usually the sky or distant mountains) and work forward to the foreground. Apply adhesive sparingly to the edges and corners to avoid glue seeping out and ruining the clean lines of the paper cut.
Creative Applications and Enhancements
Once assembled, the Mountain Lake Reflection 3D Layered shadow box becomes more than just a craft; it becomes a functional piece of decor. Its square shape and nature-inspired theme make it versatile for various settings.
Framed Wall Art
The most common application is framing. Because the layers protrude from the surface, you will need a frame with significant depth, often referred to as a "shadow box frame." Standard picture frames may crush the layers, destroying the 3D effect. When choosing glass or acrylic for the front, consider using anti-reflective coatings if the piece will be hung in a well-lit room, ensuring the viewer sees the art, not their own reflection.
Illuminated Lightboxes
One of the most striking ways to display this design is by adding LED strip lights. By placing warm-white or cool-white LEDs between specific layers—or behind the entire stack—you can turn the shadow box into a glowing lightbox. The layered paper diffuses the light beautifully, highlighting the texture of the mountains and the tranquility of the lake. This approach is particularly effective in bedrooms, nurseries, or as ambient lighting in home offices.
Gifting and Personalization
Given its aesthetic appeal, this project makes an excellent handmade gift. It conveys effort and thoughtfulness, qualities that resonate deeply with recipients. Consider customizing the paper colors to match a recipient’s interior decor or favorite season. For instance, using autumnal tones (oranges, reds, and browns) can evoke a cozy fall atmosphere, while blues and greens enhance a summer vibe.
Considerations and Limitations
While the Mountain Lake Reflection 3D Layered template offers a high-quality starting point, there are practical considerations to keep in mind. First, the images provided are for preview purposes only. The final appearance will depend heavily on the paper stock you choose. Thicker cardstock (around 180–240 gsm) holds its shape better but can be harder to cut intricately. Thinner paper cuts easily but may curl over time.
Additionally, lighting plays a critical role. As noted in the product details, final product colors may vary slightly due to lighting sources. Natural daylight will reveal the truest colors of the paper, whereas incandescent bulbs may cast a yellow hue, and fluorescent lights might appear cooler. Test your setup under different lighting conditions before permanently sealing the frame.
Finally, durability is a factor. Paper is susceptible to humidity and direct sunlight, which can cause fading or warping. Displaying the finished piece away from windows and damp areas will extend its lifespan. For long-term preservation, consider applying a matte sealant spray to the paper layers before assembly, though this should be tested on a scrap piece first to ensure it doesn’t alter the texture or translucency desired for the lightbox effect.
Conclusion
The Mountain Lake Reflection 3D Layered paper cut template represents a perfect intersection of digital convenience and analog craftsmanship. It provides a structured yet creative pathway for users to engage in a rewarding DIY project. Whether you are utilizing a cutting machine for precision or working by hand for a more personal touch, the result is a stunning representation of natural beauty that adds depth and character to any environment. By understanding the tools, techniques, and creative possibilities outlined here, you can confidently embark on this journey, transforming a simple digital file into a tangible masterpiece that reflects your own style and skill.