Creating Depth: A Comprehensive Guide to Using 3D Layered Bee and Honeycomb SVG Files
In the vibrant world of digital crafting, few themes capture the imagination quite like the industrious bee and the intricate geometry of the honeycomb. These symbols represent nature’s perfect efficiency, sweetness, and community. However, bringing these concepts to life in physical media requires more than just a simple outline. It demands depth, dimension, and precision. This is where 3D layered designs come into play, offering creators the ability to transform flat digital files into stunning three-dimensional artworks.
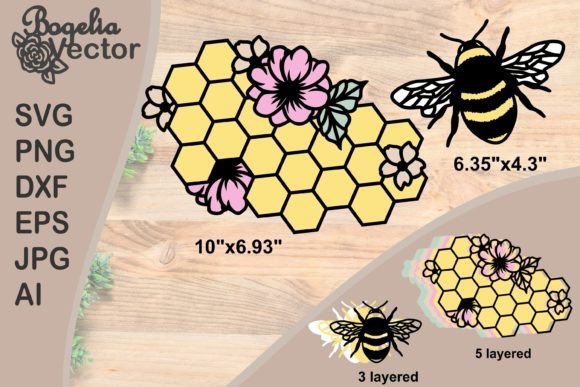
If you are a crafter, designer, or small business owner looking to elevate your projects with 3D Bee, 3D Honey Comb 5 Layered graphics, or their corresponding Svg Cut Files, this guide will walk you through everything you need to know. From understanding the technical specifications to mastering the assembly process, we will explore how to leverage these versatile vector assets for engraving, cutting, printing, and beyond.
Understanding the Power of Vector Graphics in Crafting
Before diving into the specific aesthetics of bees and hives, it is crucial to understand why vector formats like SVG (Scalable Vector Graphics), DXF (Drawing Exchange Format), and EPS (Encapsulated PostScript) are the gold standard for laser cutters, vinyl cutters, and CNC machines. Unlike raster images (such as JPG or PNG), which are made of pixels and become blurry when resized, vectors are built on mathematical equations.
This mathematical foundation ensures that no matter how large or small you scale your design, the lines remain crisp and precise. For complex projects like a Layered Mandala Svg or a detailed Floral Bee Honey Svg Cut File, this precision is non-negotiable. A single pixel error in a raster image can result in jagged edges on a wooden sign or misaligned layers in a paper craft. By using vector files, you guarantee that every curve of the bee’s wing and every hexagon of the honeycomb is rendered flawlessly.
Why Choose a 5-Layered Design?
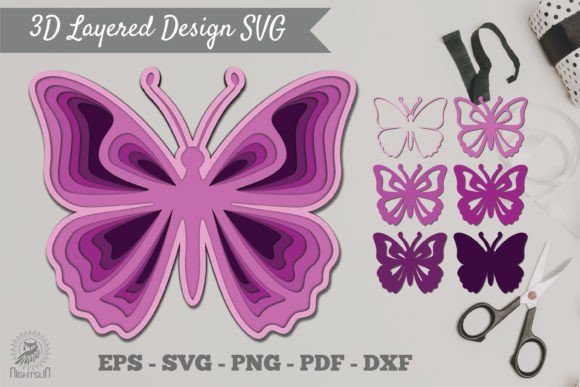
You might wonder why a 3D Honey Comb 5 Layered file is superior to a single-layer silhouette. The answer lies in the concept of parallax and shadowing. In traditional two-dimensional art, depth is simulated through shading. In physical crafting, however, true depth is achieved by stacking materials. A five-layer design allows for:
- Realistic Dimensionality: Each layer sits slightly behind or in front of the others, creating tangible shadows and a sense of volume.
- Complex Detailing: Intricate details, such as the texture of a honeycomb or the veins in floral elements, can be separated across layers without cluttering the final image.
- Visual Interest: As the viewer moves around the piece, the shifting perspective adds a dynamic quality that flat designs lack.
Decoding the File Package: What You Get
When purchasing or downloading a comprehensive crafting pack—such as those containing 3D Bee Svg and 3D Honey Comb Svg 5 layered files—it is essential to know exactly what is inside the package. Most high-quality digital assets are delivered in a compressed zip archive. Before you begin working, you must extract this folder to access the individual files.
A robust package typically includes multiple formats to ensure compatibility with various software and hardware:
- AI (Adobe Illustrator): Ideal for professional designers who need to edit paths, colors, and nodes extensively.
- SVG: The most popular format for Cricut and Silhouette machines, as well as web use. It is lightweight and widely supported.
- DXF: Often preferred by laser cutter software (like LightBurn) and CAD programs. It provides clean line data for precise cutting.
- EPS: An older but still reliable vector format used in many print-on-demand platforms and older cutting software.
- JPG and PNG: While not suitable for direct machine cutting due to their pixel-based nature, these raster images are included for preview purposes, T-shirt sublimation printing, or digital scrapbooking.
Note: Always check the resolution of the JPG/PNG files if you intend to use them for printing. High-resolution (300 DPI) is recommended for clear prints.
Practical Applications: From Engraving to Apparel
The versatility of these files means they can be applied across a wide spectrum of creative endeavors. Let’s explore some of the most common and profitable uses for 3D Bee and Honeycomb designs.
Laser Cutting and Woodworking
Wood is the natural partner for bee-themed designs. Using a laser cutter, you can cut plywood or MDF using the Dxf or SVG files. The five-layer structure works beautifully here. By staining each layer a different shade of amber, brown, or gold, you can create a rustic yet elegant wall hanging. The contrast between the light outer layers and the dark inner core of the honeycomb mimics the look of real wood grain, enhancing the organic feel.
Vinyl Decals and Window Clings
For smaller projects, such as water bottles, laptops, or car windows, a simplified version of the Floral Bee Honey Svg Cut Files can be cut from adhesive vinyl. While the full 3D effect is lost in a single layer of vinyl, you can simulate depth by using contrasting colors. For example, cut the bee body in black, the wings in translucent white, and the background flowers in pastel yellow. Layering these vinyl pieces manually creates a pseudo-3D effect that is perfect for stickers.
T-Shirt Printing and Sublimation
The inclusion of JPG and PNG files in your package opens up the world of textile printing. Whether you are using heat transfer vinyl (HTV) or dye-sublimation, these high-quality raster images serve as excellent base designs. You can import the 3D Bee PNG into your design software, add text, and print it onto fabric. This is particularly effective for merchandise related to beekeeping awareness, spring festivals, or eco-friendly brands.
Engraving Projects
If you have a laser engraver rather than a cutter, you can use the vector paths to etch designs into acrylic, leather, or coated metals. The Layered Mandala Svg aspect of the honeycomb design translates perfectly to engraving, allowing for intricate patterns that catch the light. Imagine an engraved wooden plaque with a raised relief effect created by varying the depth settings of your laser—a direct result of understanding the layered nature of the source file.
Step-by-Step Assembly Guide
Once you have extracted your zip file and opened your design software (such as Cricut Design Space, Silhouette Studio, or Adobe Illustrator), follow these steps to achieve the best results:
1. Prepare Your Layers
Import the 3D Honey Comb 5 Layered file. Ensure that each layer is on a separate page or grouped distinctly. If the layers are overlapping incorrectly, use the "Weld" or "Union" tool carefully to merge shapes within a single layer, but keep the layers separate from one another.
2. Material Selection
Choose materials that complement the theme. For a classic look, use kraft paper for the background layers and metallic gold cardstock for the bee. For a modern twist, try black acrylic for the back layers and frosted acrylic for the front. Consistency in material thickness is key; if one layer is thicker than the others, the alignment will be off.
3. Cutting and Engraving
Send the files to your machine. If using a laser, adjust the power and speed settings according to your material. Remember to test cut a small section first. For vinyl cutters, ensure your blade depth is set correctly to avoid cutting through the backing paper.
4. Assembly and Adhesion
This is where the magic happens. Start with the largest, back-most layer (usually the background honeycomb). Apply double-sided foam tape or glue dots to the back of the next layer. This adhesive choice is critical; it creates the physical gap that produces the shadow and depth. Continue stacking until you reach the front-most layer (the bee). Press firmly to ensure all layers adhere evenly.
Common Misunderstandings and Tips
Beginners often make the mistake of assuming that a "3D" file automatically cuts itself into a sculpture. It is important to remember that these are still flat files designed to be assembled manually. Additionally, do not ignore the template guidelines often provided in the zip file. These templates show the intended order of assembly and color coding, which saves significant time during the cutting phase.
Another common error is scaling the design unevenly. Always lock the aspect ratio when resizing your 3D Bee Svg to prevent distortion. Furthermore, while the files are editable, altering the structural integrity of the honeycomb hexagons too much may cause weak points in the cut material, leading to breakage during assembly.
Conclusion
The intersection of technology and nature is beautifully represented in 3D Layered Bee and Honeycomb designs. By utilizing the diverse range of formats available—from AI and SVG for digital precision to JPG and PNG for broad application—you unlock endless creative possibilities. Whether you are crafting a heartfelt gift, producing inventory for your online store, or simply exploring your artistic side, these files provide a sturdy foundation for success.
Remember to extract your zip archives, respect the layer hierarchy, and choose materials that enhance the visual narrative. With the right tools and a bit of patience, you can transform simple digital vectors into tangible works of art that buzz with creativity and charm.