2025 Calendar - 3d Papercraft
If you are looking for a way to break away from the endless scrolling of digital screens and add a tangible, creative element to your year ahead, the 2025 Calendar - 3d Papercraft offers a refreshing alternative. This isn't just another sheet of paper with dates on it; it is an interactive project that blends utility with art. For creators, hobbyists, and anyone who appreciates hands-on activities, assembling this calendar provides a satisfying pause in a busy schedule. The process transforms a flat PDF into a three-dimensional object that serves as both a functional timekeeper and a decorative piece.
The appeal of papercraft lies in its simplicity and the immediate reward of seeing a design come to life. Unlike complex DIY projects that require specialized tools or expensive materials, this calendar is designed for accessibility. You do not need a workshop or professional engineering skills. With basic household items and about thirty minutes of focused time, you can create a sturdy, visually striking calendar that stands on your desk or hangs on your wall. It bridges the gap between digital convenience and physical craftsmanship, offering a unique tactile experience that resonates with adults aged 20 to 50 who seek meaningful engagement with their surroundings.
Why Choose a 3D Papercraft Calendar?
In an era where most calendars are locked behind smartphone apps, there is a growing desire for analog solutions. A 3D papercraft calendar brings structure and aesthetic pleasure to your workspace or home office. It acts as a focal point, encouraging mindfulness as you interact with it daily. Whether you are a freelancer managing tight deadlines, an educator planning semester schedules, or a small business owner organizing client meetings, having a physical calendar can help reduce digital fatigue.
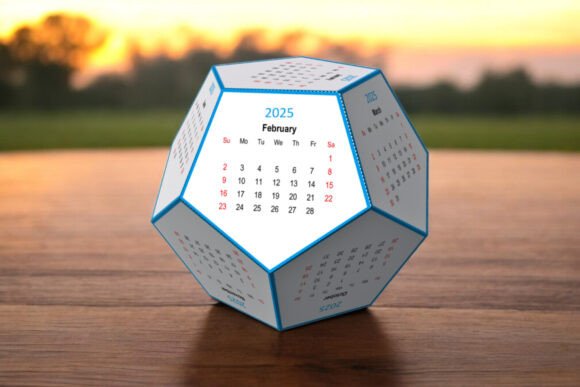
The assembly process itself is therapeutic. Cutting, scoring, folding, and gluing requires concentration, which can be a form of active meditation. For parents, it can be a bonding activity with older children or teenagers, teaching them fine motor skills and patience. For solo users, it is a rewarding weekend project that results in a personalized item. The assembled size of 15 x 20 x 18 cm makes it substantial enough to be noticed but compact enough to fit comfortably on most desks without cluttering your space.
Who Can Benefit from This Project?
The versatility of the 2025 Calendar - 3d Papercraft means it suits a wide range of individuals. Here is how different groups might integrate this tool into their lives:
- Creatives and Designers: Use the calendar as a portfolio piece to showcase your appreciation for clean lines and structural design. Display it in your studio to inspire daily creativity.
- Educators and Students: Incorporate the assembly into art classes or study breaks. It serves as a practical example of geometry and spatial reasoning while providing a useful organizational tool for the academic year.
- Small Business Owners: Place these calendars on reception desks or employee workstations. They offer a branded, yet personal touch that feels more thoughtful than mass-produced merchandise.
- Hobbyists and Crafters: Even if you already enjoy papercraft, this specific design offers a manageable challenge. It allows you to practice precision cutting and gluing techniques without the overwhelm of larger models.
- Remote Workers: For those working from home, a physical calendar helps separate work hours from leisure time. Seeing the days physically turn or slide can provide a psychological cue that the day has progressed.
What You Need to Get Started
One of the strongest advantages of this digital download is the low barrier to entry. You likely have most of what you need right now. To assemble the 2025 Calendar - 3d Papercraft, you will need the following:
- PDF File: The digital template containing all the necessary cut lines and fold guides.
- A4 Letter Cardstock Paper: Standard printer paper may be too flimsy. Cardstock provides the rigidity needed for the 3D structure to hold its shape over time.
- Colored Printer: While black and white works, color brings the design to life. Ensure your printer handles cardstock well to avoid jams.
- Cutting Tools: Sharp scissors for general cuts and a craft knife for intricate details.
- Adhesive: Glue sticks or liquid glue work best. Avoid excessive moisture, which can warp the paper.
- Folding Tools: A bone folder, a ruler, or even a non-working ballpoint pen (used without ink) to score the folds. Scoring ensures crisp, clean edges rather than messy creases.
The total assembling time is approximately 30 minutes. This estimate assumes you are printing, cutting, and assembling in one session. If you prefer to spread the work out, the modular nature of the design allows you to complete sections at your own pace.
How to Assemble Your Calendar
Getting started is straightforward, but attention to detail makes the difference between a wobbly model and a professional-looking piece. First, print the templates full size on A4 paper. Check your printer settings to ensure "Actual Size" or "100%" scale is selected so that the alignment marks match correctly.
Once printed, carefully cut out each piece. Use a craft knife for internal shapes and curves, keeping your blade sharp for clean edges. Next comes the scoring phase. Place a ruler along the fold lines and run your bone folder or non-working pen firmly along the line. This compresses the fibers of the cardstock, allowing it to bend sharply without cracking. Finally, apply glue to the designated flaps and press the pieces together. Hold them in place for a few seconds to ensure a strong bond. Allow the glue to dry completely before handling the finished product.
Practical Considerations Before You Begin
While the project is simple, a few considerations will enhance your experience. First, consider the quality of your cardstock. Heavier weights (around 200-250 gsm) provide better durability, especially if the calendar will be moved frequently. Second, lighting matters. Perform your cutting and gluing in a well-lit area to see the fine details clearly, reducing eye strain and mistakes.
Additionally, think about where you plan to display the calendar. If it will sit on a desk, ensure the base is stable. If you intend to hang it, check the structural integrity of the top loop or attachment point during assembly. Some users choose to laminate the finished calendar for added protection against spills or wear, though this adds an extra step. Remember, the goal is enjoyment, so don’t rush. Take your time with the folds and alignments.
Maximizing the Value of Your 2025 Calendar
Once assembled, the 2025 Calendar - 3d Papercraft becomes more than just a date tracker. It can serve as a visual anchor for your goals. Use colored markers or sticky notes directly on the 3D surfaces to mark important events, deadlines, or personal milestones. The vertical orientation of some designs allows you to write notes on the side panels, effectively turning your calendar into a mini bulletin board.
For marketers and bloggers, this unique format can be featured in content creation. Sharing photos or videos of the assembly process on social media can engage followers who appreciate DIY culture. It demonstrates a commitment to tangible, high-quality content in a digital world. For educators, it can be part of a lesson on sustainable design, discussing how digital files translate into physical objects with minimal waste.
Ultimately, the value of this calendar lies in the intentionality it brings to your year. In a world of instant gratification, taking thirty minutes to build something by hand is a powerful statement. It slows you down, connects you to the present moment, and gives you a beautiful, functional object to guide you through 2025. If you have any questions during the assembly process, feel free to reach out. Crafting should be enjoyable, and support is always available to help you achieve a perfect result.